Adding a Geofence
To create a Geofence, click on the Add Geofence, right at the bottom of the Geofences List, on the main Geofence Page.
1. Type
The initial step involves selecting the method for creating the geofence. Opt for the manual route by clicking Add Geofence and following the step-by-step process. Alternatively, streamline the process by uploading a KML file; simply click Upload KML to seamlessly integrate geofence data from an external source. This flexibility caters to different preferences, allowing users to either manually define the geofence or efficiently import spatial data through a KML file for a quicker and more automated setup.
The subsequent displayed steps pertain to the manual addition of a geofence.
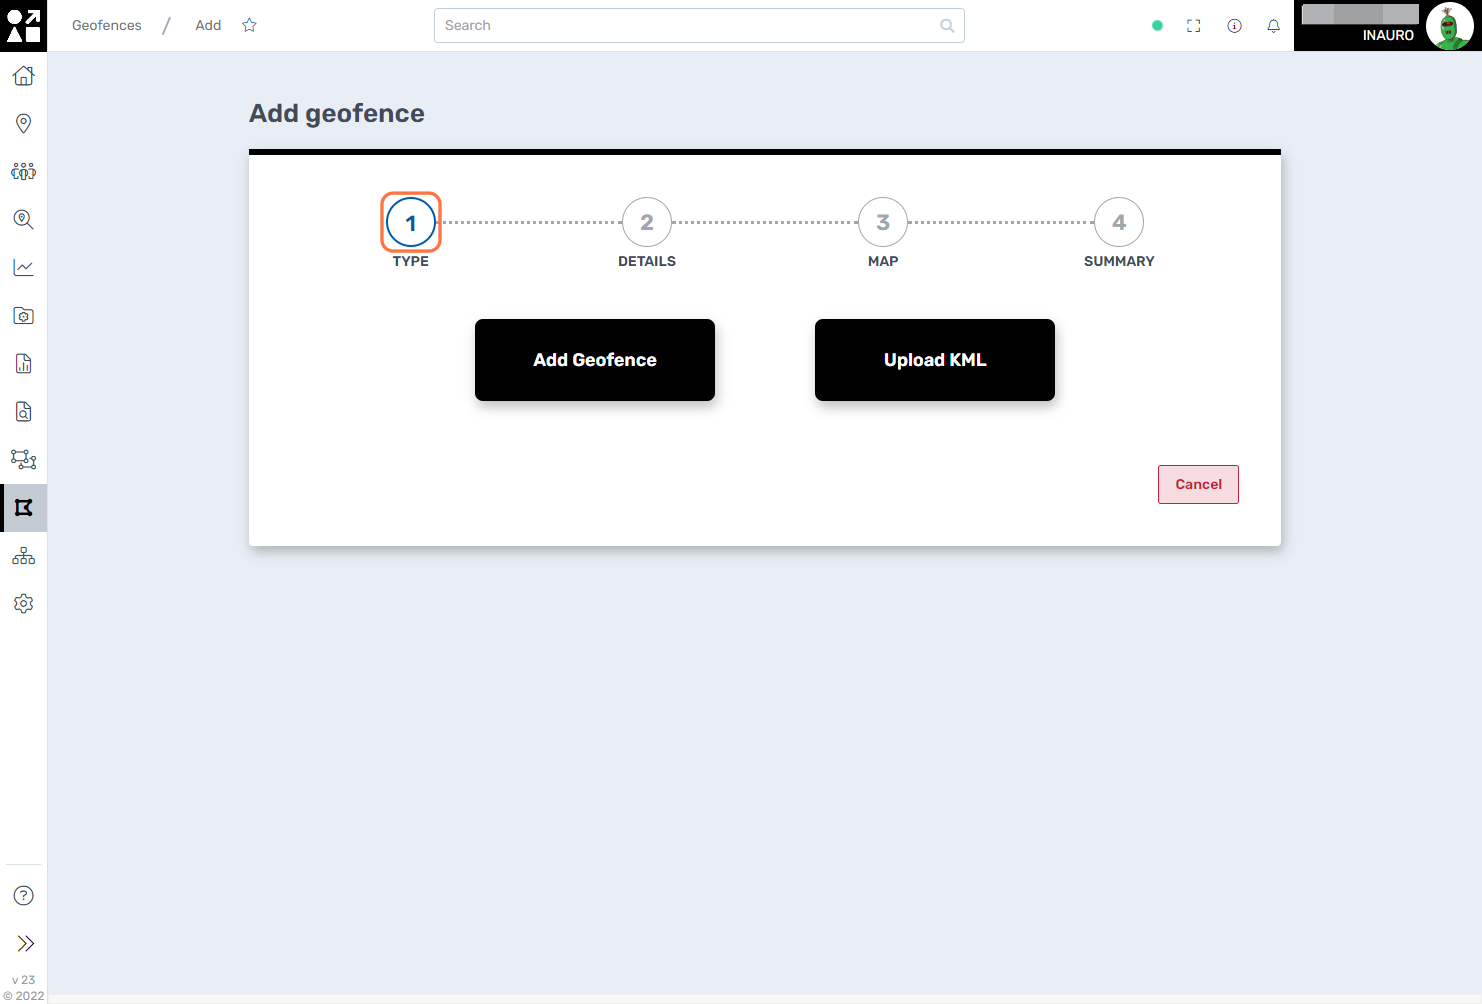
The subsequent displayed steps pertain to the manual addition of a geofence.
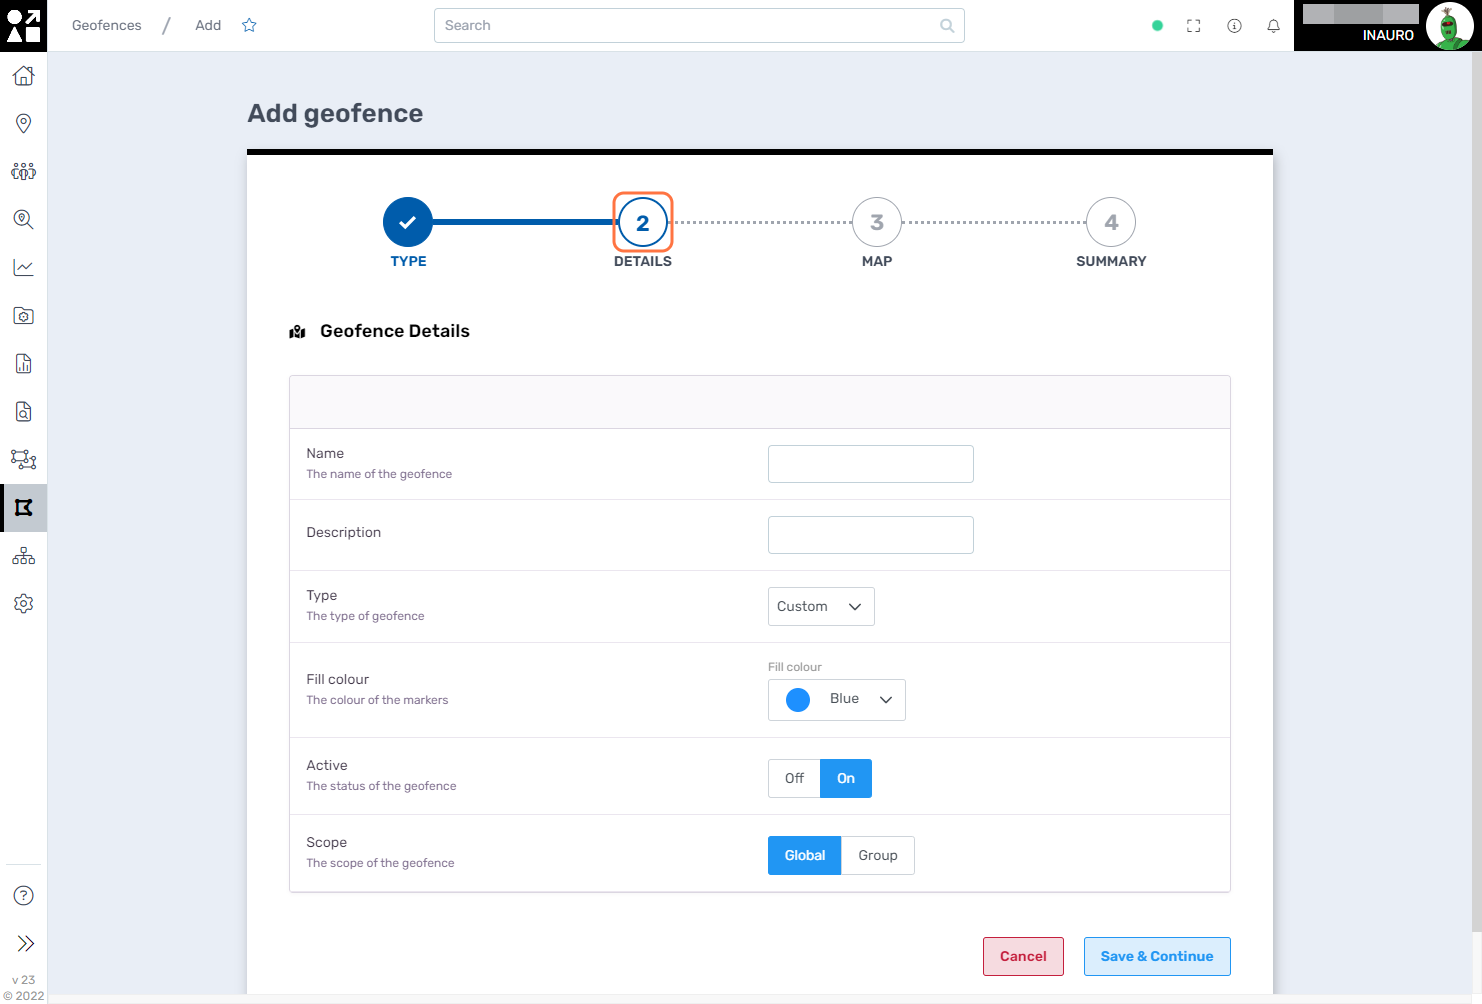
2. Details
Proceed by completing the details for your geofence. Provide accurate information and specify the necessary parameters to define the geographical boundaries according to your requirements.
Special attention when defining the Scope of the Geofence, you have the option to configure the scope to behave either globally or specifically by group. When set to Global, groups are encompassed in the geofence based on the assets currently inside. Alternatively, when configured for Groups, this menu provides a detailed view of the specific groups currently residing within the geofenced area. This nuanced approach allows for flexible monitoring, accommodating various organizational structures and preferences for a tailored and insightful perspective on asset groupings within the geofence.
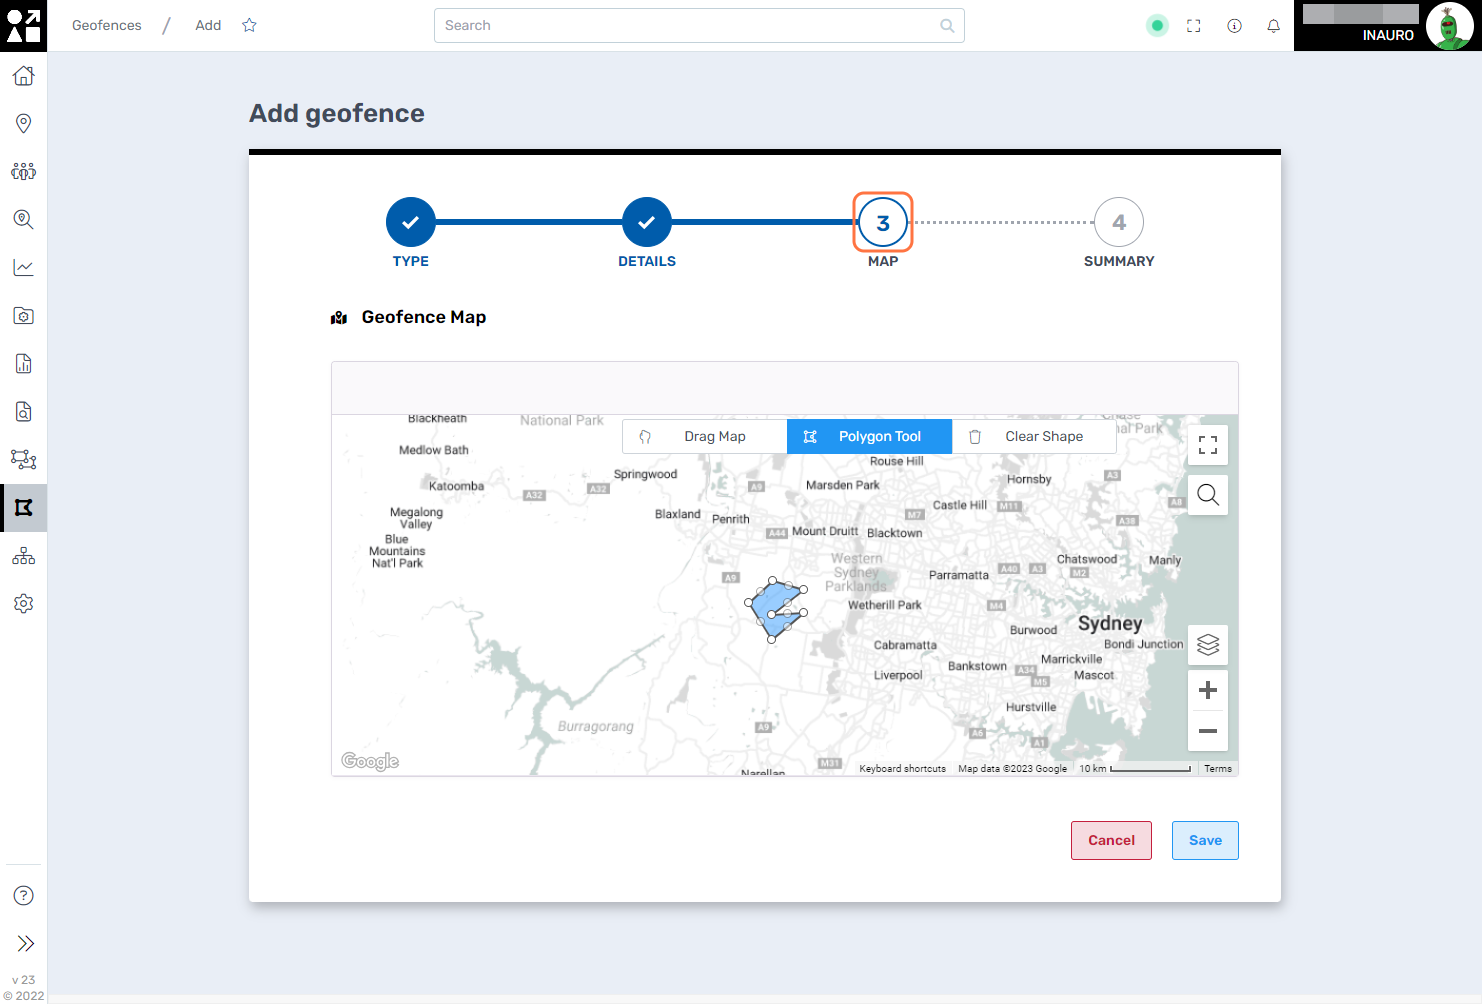
3. Map
Utilize the Polygon Tool button to reshape the geofence according to specific requirements or opt to clear the shape entirely by clicking Clear Shape. This intuitive functionality provides users with a versatile toolkit for precise geofence adjustments, ensuring adaptability and ease of use in tailoring spatial parameters to meet changing needs or evolving geographical considerations.
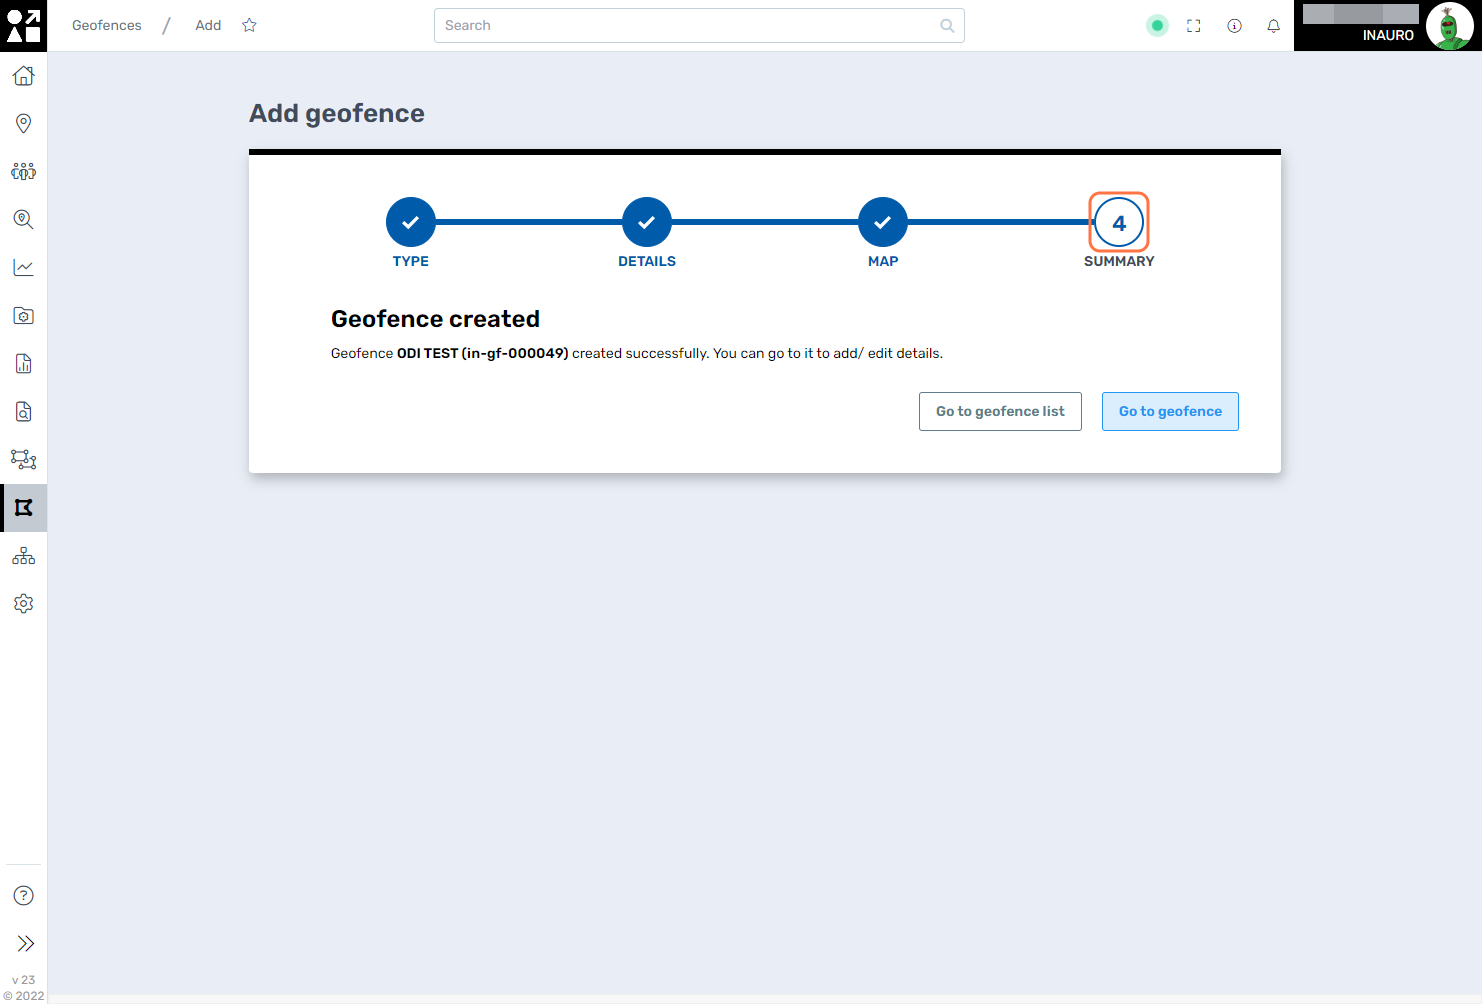
4. Summary
Upon successfully completing all the steps, you will arrive at this screen, confirming the successful creation of your Geofence. Once finished, you have the option to return to the Main Geofence List page or proceed directly to the specific group by selecting Go To Geofence.