
Overview
In Perspio Workflows, asset variables let you build Email and SMS actions that automatically include the right asset information at the moment the workflow fires—without manually typing (and maintaining) asset names, IDs, contact details, or telemetry values.
This article explains how to:
-
Insert asset identifiers (e.g., Asset Name, Perspio ID, Customer Asset ID) into Email/SMS content so recipients can quickly identify the impacted asset.
-
Use asset contact fields (email/phone) as recipients so you don’t have to hardcode addresses or numbers.
-
Add configuration and telemetry values into notifications to provide immediate context.
Why use asset variables in Actions
Using variables in Actions improves:
-
Speed to understand: recipients instantly know which asset triggered the alert.
-
Consistency: every notification follows the same format.
-
Maintainability: when asset details/contacts change in the asset master, notifications automatically use the updated values.
-
Operational context: include telemetry/config details (where available) to reduce back-and-forth investigation.
Where this is configured
Asset variables are most commonly used in:
-
Actions → Send SMS → Message
-
Actions → Send Email → Subject and Body
-
Actions → Recipients (via attribute selection, such as Contact Email/Phone)
Variables are accessed via the Variable Inspector and/or via Select attribute pickers inside recipient fields.
Before you start
-
Your workflow should already have:
-
a defined Type
-
a defined Scope
-
a built Condition
-
a configured Schedule / Suppression (if required)
-
-
Asset records should contain the information you intend to use (e.g., contacts, asset identifiers). If a field is not populated, it may appear as NA in Variable Inspector and may resolve as blank when the workflow fires.
Step 1 – Navigate to the Actions step
In the Add Workflow Wizard, go to Step 5: Actions.
What you see on the Actions step
-
An Actions page header with a Variable inspector button (top-right).
-
Action blocks such as Send SMS and Send Email.
-
Each action block includes a remove (X) control in the top-right corner to delete that action.
-
A dropdown (e.g., Select an action to add) to add more action types.
Step 2 – Understand action fields you can populate with variables
Send SMS
Key fields
-
Recipient(s) (required)
-
Country selector (e.g., AU)
-
Phone number entry
-
Add button (to add the typed number to recipients)
-
Select attribute dropdown (to add dynamic recipients)
-
Add button (to add the selected attribute as a recipient)
-
-
Message (required)
-
Message content box
-
Character counter (e.g., “Characters remaining: 320”)
-
Send Email
Key fields
-
Recipient(s) (required)
-
Email entry
-
Add button (to add typed address)
-
Select attribute dropdown (to add dynamic recipients)
-
Add button (to add the selected attribute)
-
-
Subject (required)
-
Body (required)
Best practice: Treat Recipients as “where the message goes” and Subject/Body/Message as “what the message says”, and use variables in both to make alerts actionable.
Step 3 – Add recipients dynamically using asset contact attributes
If your asset master includes contact information, you can select it as a recipient attribute rather than typing phone numbers/emails.
How it works
-
In Recipient(s), open Select attribute.
-
Choose the relevant contact field (e.g., a “Contact Email” or “Contact Phone” field).
-
Select Add to include it as a recipient.
This means the workflow will send notifications to the contact details stored against the asset—reducing manual maintenance.

Best practice
-
Prefer attribute-driven recipients when the workflow should notify a customer/driver/site contact tied to the asset.
-
Prefer static recipients when the workflow should notify an internal team mailbox or on-call group.
Step 4 – Open Variable Inspector to view and copy available variables
Select Variable Inspector (top-right of Actions).
Variable Inspector screen controls
-
Asset selector dropdown (top): pick a sample asset to preview available fields and current values.
-
Expandable categories:
-
Asset Details
-
Asset Telemetry
-
Asset Configuration
-
Asset Reminders
-
-
Close (X) (top-right) and Close button (bottom-right)

Step 5 – Copy a variable and paste it into an action (SMS or Email)
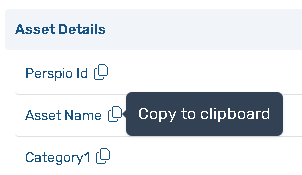
Expand a category (commonly Asset Details) and locate the field you want to insert.
How to copy a variable
-
Expand the relevant category (e.g., Asset Details).
-
Find the field (e.g., Asset Name, Perspio ID, Customer Asset ID).
-
Click the copy icon next to the field name.
-
Tooltip may appear (e.g., “Copy to clipboard”).
-
-
Paste into:
-
SMS → Message
-
Email → Subject
-
Email → Body
-
Important: Paste the token exactly as copied. Perspio resolves it at runtime using the asset that triggered the workflow. It looks like
Recommended patterns for Action content
1) Always include asset identity
At minimum, include:
-
Asset Name
-
A stable identifier (e.g., Perspio ID or Customer Asset ID)
This ensures recipients can identify the asset even if names are similar.
2) Include “what happened” + “why you’re receiving this”
Add:
-
A short incident summary (e.g., “Temperature out of range”, “Device offline”, “Door open”)
-
The key value that triggered it (from telemetry/config where relevant)
3) Include operational context (when available)
Common helpful fields include:
-
Last known telemetry value (e.g., temperature, voltage, speed)
-
Last update timestamp
-
Key configuration values relevant to the condition
Example message structures (use copied variables)
SMS structure
-
ALERT: <Asset Name variable> (<Perspio ID variable>) – <Trigger summary>. Value: <Relevant telemetry variable>.
Email subject structure
-
Workflow Alert – <Asset Name variable> – <Trigger summary>
Email body structure
-
Asset identifiers (name + IDs)
-
Trigger summary and key values
-
Timestamp / last update
-
Any useful configuration/reminder fields
(Replace the <… variable> placeholders above by pasting the real variable tokens copied from Variable Inspector.)
How variables resolve when the workflow fires
When a workflow triggers:
-
Perspio selects the asset(s) that met the condition within scope.
-
Any variable tokens in Actions resolve using that asset’s:
-
Details (master data)
-
Configuration
-
Telemetry
-
Reminders
-
-
If a field is not available or not populated, it may resolve as blank (or equivalent behaviour depending on tenant configuration).
Troubleshooting
-
Variable shows NA in Variable Inspector: the field isn’t populated for the selected asset. Try another asset or update the asset master.
-
Emails/SMS missing key info: confirm you pasted the variable token into the action fields (subject/body/message), not only viewed it.
-
Recipients not being pulled correctly: verify the asset contact fields are populated and you added them via Select attribute → Add.
-
Too much noise: review Scheduling and Suppression settings so actions don’t trigger repeatedly.